Wednesday, November 26, 2008

NY Fashion Online Ad


Hi. everyone, this Ad is actually one of my client's e-commerce website. NY Fashion sells best of breed Nascar Jackets, Cartoon Character Jackets, NBA Jackets, Men & Women Apparel and Kids Uniforms etc. I have designed a custom LiteCommerce theme and customized the basic software in many ways, now it's a working online store :) Link: www.nyfashiononline.com

However, I have also designed this banner in Adobe Flash. See more of my work here www.souldesigns.net

Wednesday, October 08, 2008

Mind-controlled devices: for PC-games and beyond


If you think mind-control and telekinesis used to be the type of stuff you could only find in sci-fi flicks or paranormal literature, think again.
Emotiv Systems is creating "the ultimate interface for the next-generation of human-machine interaction...(it) has created technologies that allow machines to take both conscious and non-conscious inputs directly from your mind." Using electroencephalography or EEG, Emotiv Systems has developed a way for you to communicate with your computer with your thoughts, via your brain's electrical activity. While this techonology offers endless possibilities for a wide span of industries, Emotive Systems is currently setting its sights on the entertainment gaming industries.

Look Ma, no hands! No wires, no mice, no keyboards, no joysticks, this brain-computer interface is now becoming a reality with the use of wireless headset called Epoc. A lot more like the telepathic superpowers of X-Men's hero Professor X (when you control your game characters) or the villain Magneto (when you control objects) Epoc gives you this mind-control power once you slip on this headgear. It does its work by reading the electrical signals from your brain and translating them into commands that control the computer.

To clearly illustrate its capabilities, Epoc comes bundled with a computer game. You need not strain yourself with the rigors of "hand-eye coordination" with this gadget. You can "lift" or "bend" things on the monitor by just willing the action in your mind. Hello Francis Xavier!
It is also interesting to note that while science could not explain telekinesis, it now succeeds in simulating it through Epoc. This mind-boggling device is expected to hit the market by the end of the year.

Wednesday, June 18, 2008

"THERE" A 3D Virtual Hangout, Community and World.

"There" is an online hangout where you can meet friends, play games and explore a 3D virtual world that's yours to help design and build. Create your own fully customizable avatar - then get in There and join the crowd. To get a closer look at There, check out our Screenshot Gallery or view one of our Member Created Videos.


I haven't registered there yet but it sounds very unique and new specially 3D world concept is superb. :)

Please also post your comments here if you have experience with this community.

http://www.there.com

thanks.

Friday, June 13, 2008

Now Disney Land in 3D , Courtesy Google Earth :)


Hi. everyone out there, this has inspired me, according to these guys they have designed every inch of Disney Land in 3D and you can take a tour via Google Earth :) Fantastic stuff !!!

Also check this link on Disney Website where you can see an introductory video Click Here

Download Google Earth

Wednesday, February 06, 2008

Free Textures: Tree Trunks, Wood


Hi. Everyone,
I got these pics from two tree trunks that had a good texture on them, may be you can utilize them in your 3D project somehow. Click Images for larger view, 2560 X 1920 Resolution images.

thanks :D

Wednesday, January 02, 2008

Featured Artist: David Grier !


Hi. Again today,
I am featuring David Grier's work because we have a mutual interest of Games, and as a co-incidence we like the same video games such as King of Fighters, the great Street Fighter, Prince of Persia, God of War (yummy) :D

He has designed some great sketches of game characters, to see more of his work please goto http://david-grier.deviantart.com

I envy his drawing and coloring skills, very good practice and also bringing innovative changes to characters as well. My all time favorite character Terry Bogard is also there :D

thanks
see ya'll soon.

Happy New Year from 3D Reaction.

Happy New Year ! to every visitor, in 2008 I have decided to add more features to the blog by also adding Featured Websites that demonstrate superb graphics and animation online :) besides featured artists and links to resources.

Wednesday, December 05, 2007

Featured Artist: Danny


Hi. Danny is a superb young Artist who wants to remain a teen, even though He turned 20 this year :D hehe. See his work, it's superb and I specially like Katana!!! :) please goto http://sunna-no-gaara.deviantart.com see more of His work and info about him.

Above Images are high-resolution, please click them to see the full size image.

thanks.

Friday, November 23, 2007

Saturday, August 25, 2007

Free Textures

Click on Images to enlarge 2560x1920 Resolution textures that I picked up with my camera. No rights reserved, use them as you wish!!! :D


Sunday, July 29, 2007

Featured Artist: Harald Belker

On 27th Jul 2007 I emailed Harald Belker, the reknowned CG Car Designer of the Hollywood asking his permission to put his work on my blog :) seriously I wasn't expecting an answer but only after one day he replied to me and positively allowed me to post his work on the website :D. As I also am a Car Enthusiast that's why you'll see a lot of car related stuff on my blog too :)


His BIO:
Every designer has that one little “something” which, long ago, clued them into their artistic abilities. Mine was a car magazine, given to me during my senior year in college (on a tennis scholarship of all things). One of the automotive design schools advertised in it was called Art Center College of Design. Noting that this “Art Center” was located in sunny Southern California, I quit practice early that day, drew some pictures and sent them off.

My first day at Art Center struck like a bolt of lightning, and I spent the next four years honing my newfound craft and sharing this passion with a class that would later become a very special part of my life. After graduating with honors, I took a design job with Porsche in Stuttgart, Germany. I knew this was a rare opportunity, but my heart belonged to Los Angeles, where an equally remarkable opportunity presented itself in the form of the Advanced Design Studio for Mercedes-Benz, in Orange County.

I think for most people with a passion for their craft, the sunny skies darken a few hues when they learn the startling truths of the business world. Corporate decisions often conspire to rule design. At Mercedes, I learned that to truly make a difference in the world of design, one must be independent. I decided to forego stability and leave the corporate studio desk that I had once seen as the pinnacle of design achievement.

In the stark reality of the freelance design community, lightning struck again. An Art Center colleague called with an opportunity to design a vehicle for a project over at Warner Bros., a little production called Batman & Robin. Eight bat-vehicles later, I had a new career. Every movie I work on marks a special turning point in my design development. My most satisfying project? Minority Report, featuring a handful of futuristic vehicles. But it was bigger than vehicles. Bigger than design, even. It was a one-in-a-lifetime chance to design and realize a truly futuristic mode of transportation.

Since 1995 (back, now, in the real world), I have designed a series of electric bikes for Lee Iaccoca, created a fun array of Hotwheels for Mattel, consulted for companies such as Porsche Style in Huntington Beach and Nissan Design International, and designed vehicles and props for numerous motion pictures including Batman & Robin, Armageddon, Deep Blue Sea, Inspector Gadget, Battlefield Earth, Spider-Man, Minority Report, XXX and The Cat in the Hat.


Today, as I reflect upon my winding path in design, I’m amused by the things that helped me along the way: dreaming big, accepting life’s twists, seeking innovation, maintaining a level of fun, and, finally, recognizing a lightning strike when I saw one. This book is a compilation of design work from a group innovators and re-innovators. I am thankful to be a part of it. More Info at http://www.haraldbelker.com


Harald has also published Tutorial DVDs uncovering his work secrets, Links to Store and other information about Him & His work can be found at www.haraldbelker.com

Friday, July 27, 2007

Citroen C4 Ad. A Classic 3D Action.


This is a Citroen C4 Ad which shows the superb skills of Computer Graphics in todays media.

Wednesday, July 25, 2007

Featured Artist: Eric Jordan


Eric Jordan is an Inspiring Artist and the Visionary behind the well known design, animation & web development studio 2Advanced. Eric Jordan's work has been inspiring to me throughout the years of my career, also He is a successful entrepreneur and that's what is more inspiring. A personal portfolio site 2advanced.com became a successful agency and now has expanded to Japan as well and is playing it's role in the evolution of the online and offline digital arts media. For More info please goto www.2advanced.com

thanks.
Iqtidar Ali.

Conduit Tutorial: Cinema 4D and Adobe Photoshop by Eric Jordan

In this tutorial, I will show you how to create 3-dimensional imagery using Maxon's Cinema 4D. Additionally, I will walk you through the process of using Adobe Photoshop to enhance and add detail to your final image. This particular tutorial focuses around the "Conduit" piece I recently created for a feature on CGChannel.com

I am comfortable with Cinema 4D for a number of reasons, but this does not mean you cannot utilize another program for creating 3D. Other programs can provide excellent results as well. I recommend looking into higher end packages such as 3D Studio Max, or Rhino3D if you are on a budget.

Step 1. Basic Shapes
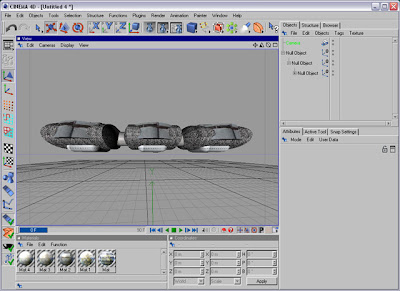
I usually begin by creating a few basic shapes and structures, applying some textures to those shapes, and then duplicating the set of shapes a few times to get an interesting form of some sort. In this particular example, I created a cylinder with some intersecting cubes, and duplicated it 3 times to get a sort of tube-like structure that will be the focus of the piece. I group these elements together so that I can continue creating a long tube in very short order. Everything we do from here on in will be based around this structure, so I try and finalize my textures and get this looking the way I want before I go any further. I typically modify my texture properties to have them reflect a bit, as this produces some interesting results in the final render.
Step 2. Camera Properties
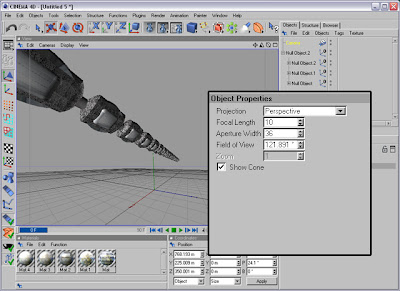
With my basic structure built, I copy it onto the stage a few more times and place them in such a way to create a long tube stretching off into the distance. Now, without an interesting perspective of this structure, it tends to look flat and uninteresting. To give our view a more dramatic angle, I create a new Camera object and modify it's properties to give me a focal length of "10". This creates a more powerful perspective that one might expect from a wide angle lens on a camera. You can also play with "aperture width" and "field of view" to get different results.

Step 3. Deformations
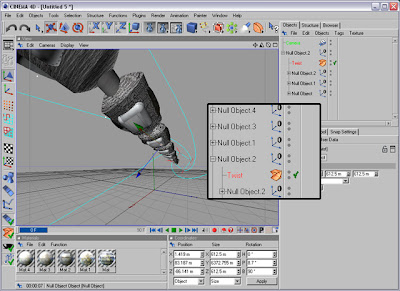
Deformations are powerful modifiers built into most 3D programs, that serve as a way to distort or modify space or objects within your 3D environment. In this instance, I will add a "twist" deformer to my group of objects and modify it's properties to essentially twist my tube in space. I can modify the coordinates and size of the "twist" deformer to produce radically different results.

Step 4. Lighting
Here I will add some basic textured cylinders to my grouped object and see how they are effected by the "twist" deformer. I go back and modify values until I get sweeping tubes that come right at the field of view, creating a dramatic foreground energy. Once I have my shapes in place, I want to add some light to the scene to give it some life. I begin by creating a simple light object. This gives some new visibility to the scene, and produces interesting shadows depending on where the light is placed in relationship to my structures. To spice things up a bit, I modify my light object to show "visible light". This causes the light to actually illuminate the space itself, rather than just effect the visibility of my shapes.
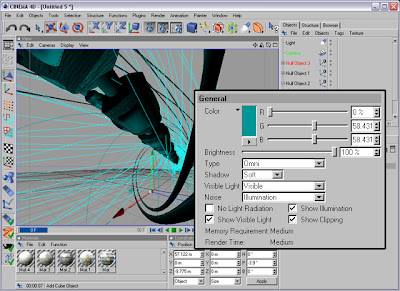

Step 5. Render
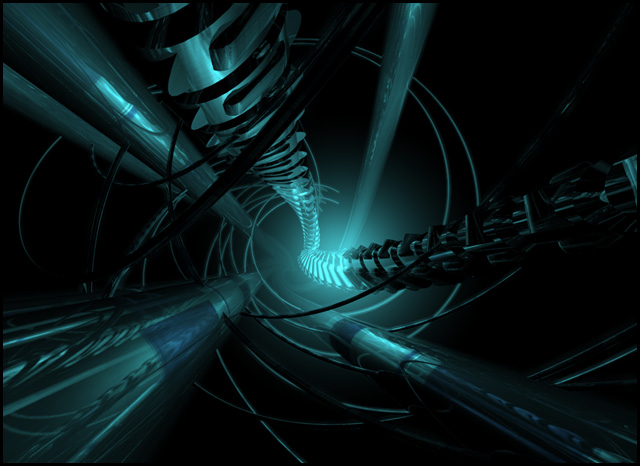
With everything in place, I render out a flat .TIF file at my desired dimensions (in this case 1024x768). As you can see below we have a very interesting render to work with. We have some dramatic perspective, some nice reflections, and some interesting lighting effects. The color is a bit more blue than I wanted, but I can always modify the hues in Photoshop to more accurately achieve the greens I desire for this piece.
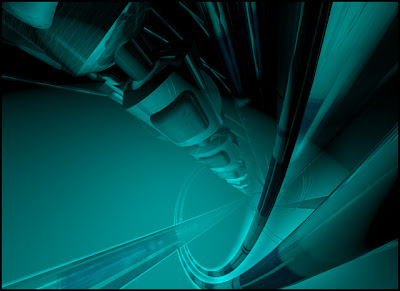

Step 5. Additional 3D Elements

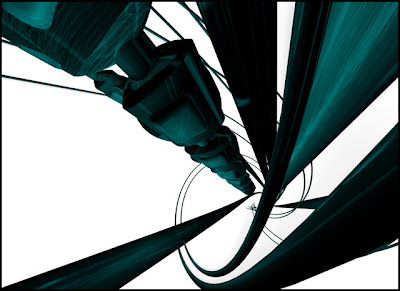
Before going into Photoshop, I want to have alot of assets to work with, as this will allow me more freedom with my image. To account for this, I will render out some additional pieces I think I will need for Photoshop. First, I render out a new version of my current 3D view with an alpha channel and no lighting effects. (Seen below)

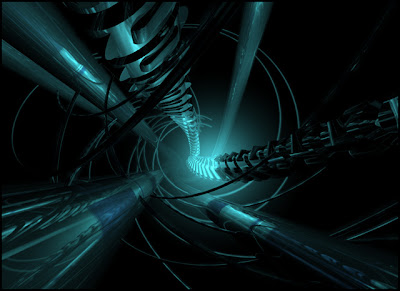
Another thing I like to do, is to create a second camera in my Cinema 4D scene, and render out an entirely different angle. This will give me some extra assets to play with in Photoshop. (Seen below)

Step 6. Photoshop
Once I get into Photoshop, I combine my two 3D renders and move them around until I've created an interesting looking composite.
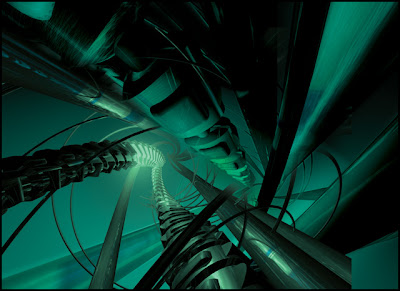

Step 7. Tweaking color and Shadows
Everything is starting to look nicer, but before I go any further I modify the hues of my renders to appear more green than blue. This is achieved in Photoshop by using "Image > Adjustments > Hue & Saturation". Additionally, I use my brush tool to darken some of the outer areas of the composition. This focuses the eye on what is happening in the middle of the piece. For some added effect, I brush a few white gradient circles over select areas and change their blending mode to "overlay", this saturates the layers underneath to give the illusion of illuminated hotspots.
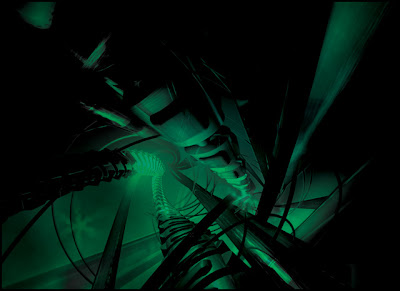

Step 8. Detail
Finally, I add some horizontal lines to one half of the image, in order to balance out the weight of the image. Then, I add a title, some extra text details and "Conduit" is born.
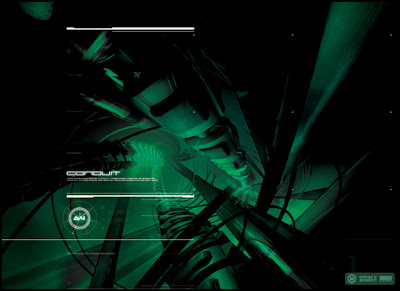
Thanks so much for taking the time to read through the tutorial, and I hope it has helped you out in some way.

-Eric Jordan
-2advanced Studios


Monday, July 23, 2007

Featured Artist: Leo Cocca!


Leo Cocca! is a young 22 year old Maya Artist, Works at Cream Studio, Sydney Australia. His work is very inspiring at this young age, look for more of his work and information at http://subaqua.deviantart.com :D

Thursday, July 19, 2007

Featured Artist: Bakka !


From Fractal Art, 3D Modeling to 3d Calligraphy Bakka! is totally a unique artist. His work shows his diversified skills and a mind that can adapt to different forms of art. I love his work You can view more of his work & info at http://bakka.deviantart.com

Thanks.